
How to Use WAN 2.1-VACE to Generate Hollywood-Level Video Edits

Imagine you are shooting a film and you realize that you have the actor wearing the wrong jacket in a scene. Do you bring the whole cast back in to re-shoot? Depending on the actors that might not be possible either logistically or financially. Plus the set is probably already torn down. The cost of a re-shoot is too high. What if we could use AI to save studios money?
We dove into this example on our Fine-Tuning Friday last week. Feel free to watch the video, or follow along with this blog post.
Big shout out to Bruce Allen who helped us put together this ComfyUI workflow. Feel free to reach out to him if you need any VFX work, he is extremely talented and has worked on everything from Marvel Trailers to music videos with some of the worlds top DJs. His insights are sprinkled through this post, and we chat with him live in the video above.
Pulp Fiction Remix
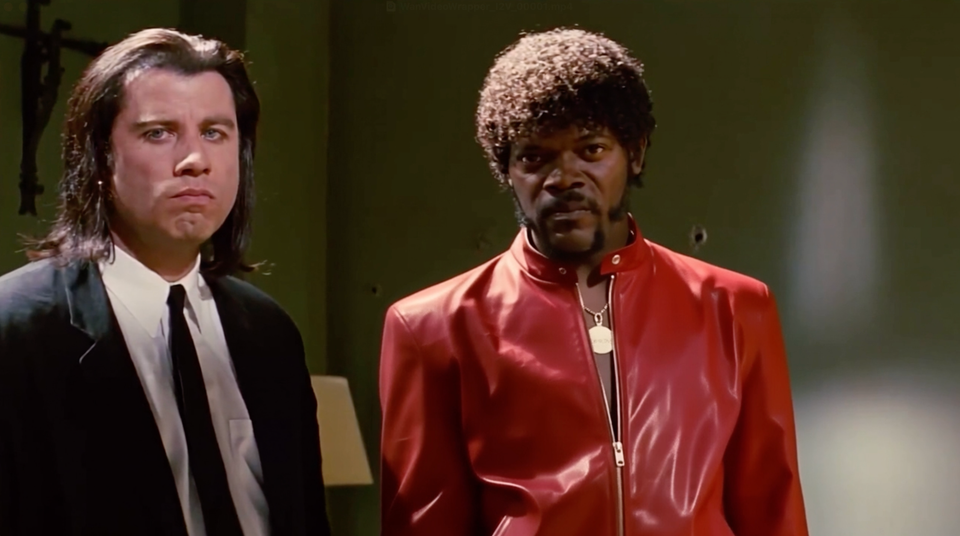
For this example, we are going to use two iconic videos. One is a famous scene from the film Pulp Fiction. The other is Eddie Murphy’s Delirious set.
Let’s take a look at the clip we want to edit.
For this example, we will replace Samuel L. Jackson’s suit on the right with a new jacket. To do this effectively, we need reference images of the jacket we intend to use.
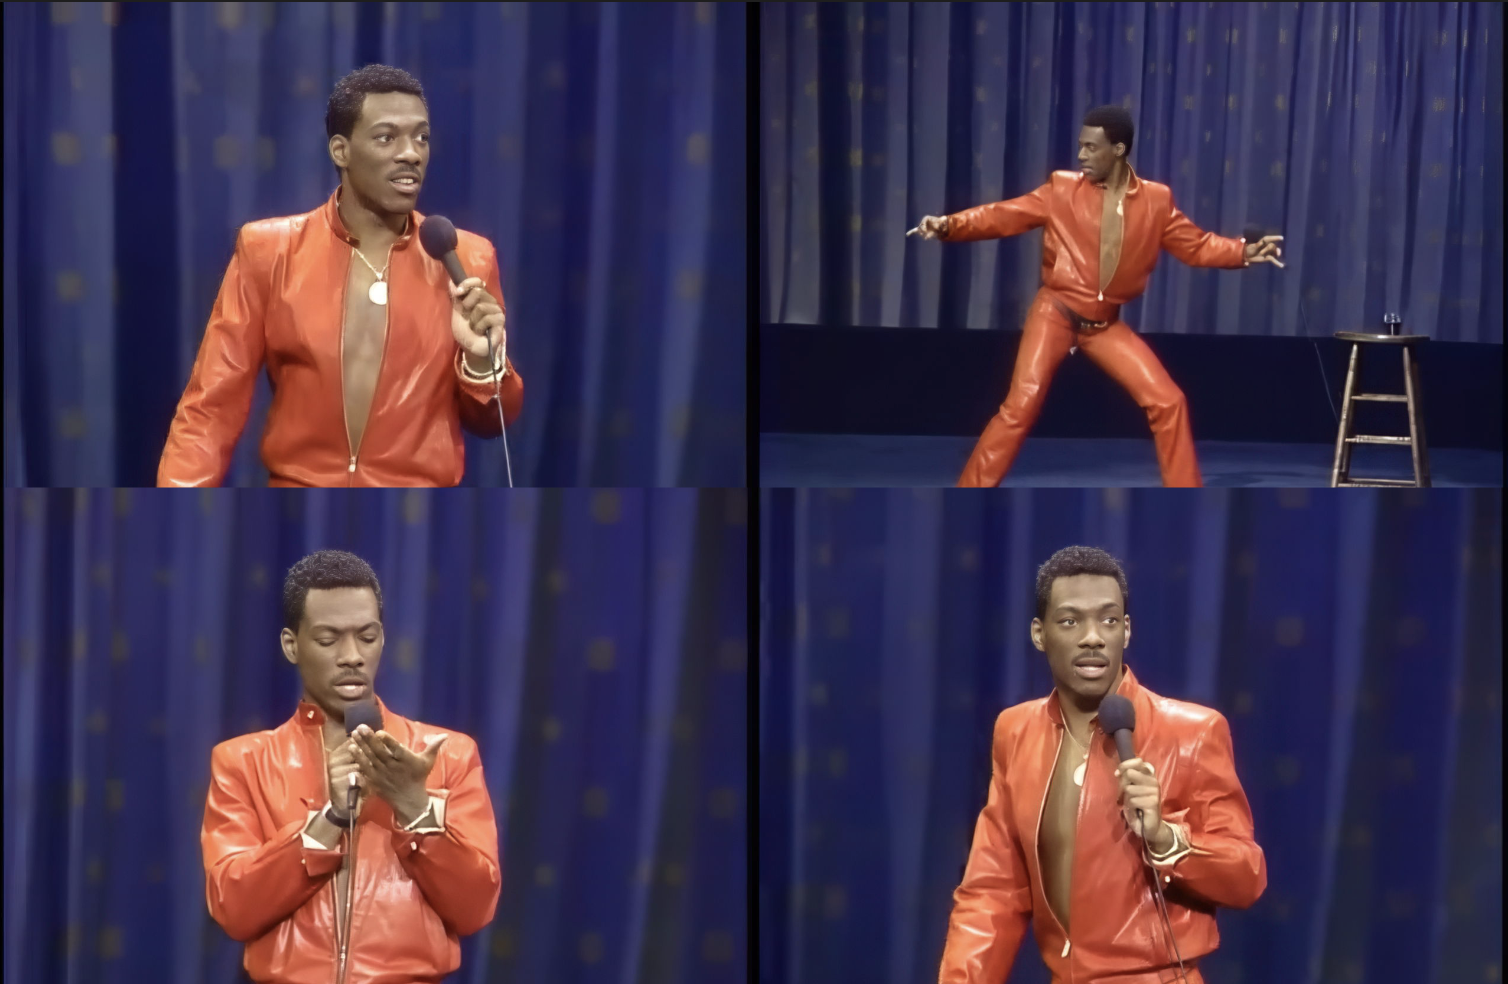
The jacket we want to use? Let's make Samuel a bit more eccentric, and put him in Eddie Murphy's iconic jacket from his Delirious standup set.
We'll be using WAN 2.1 VACE to perform the heavy lifting of this edit.
What is WAN 2.1 VACE?
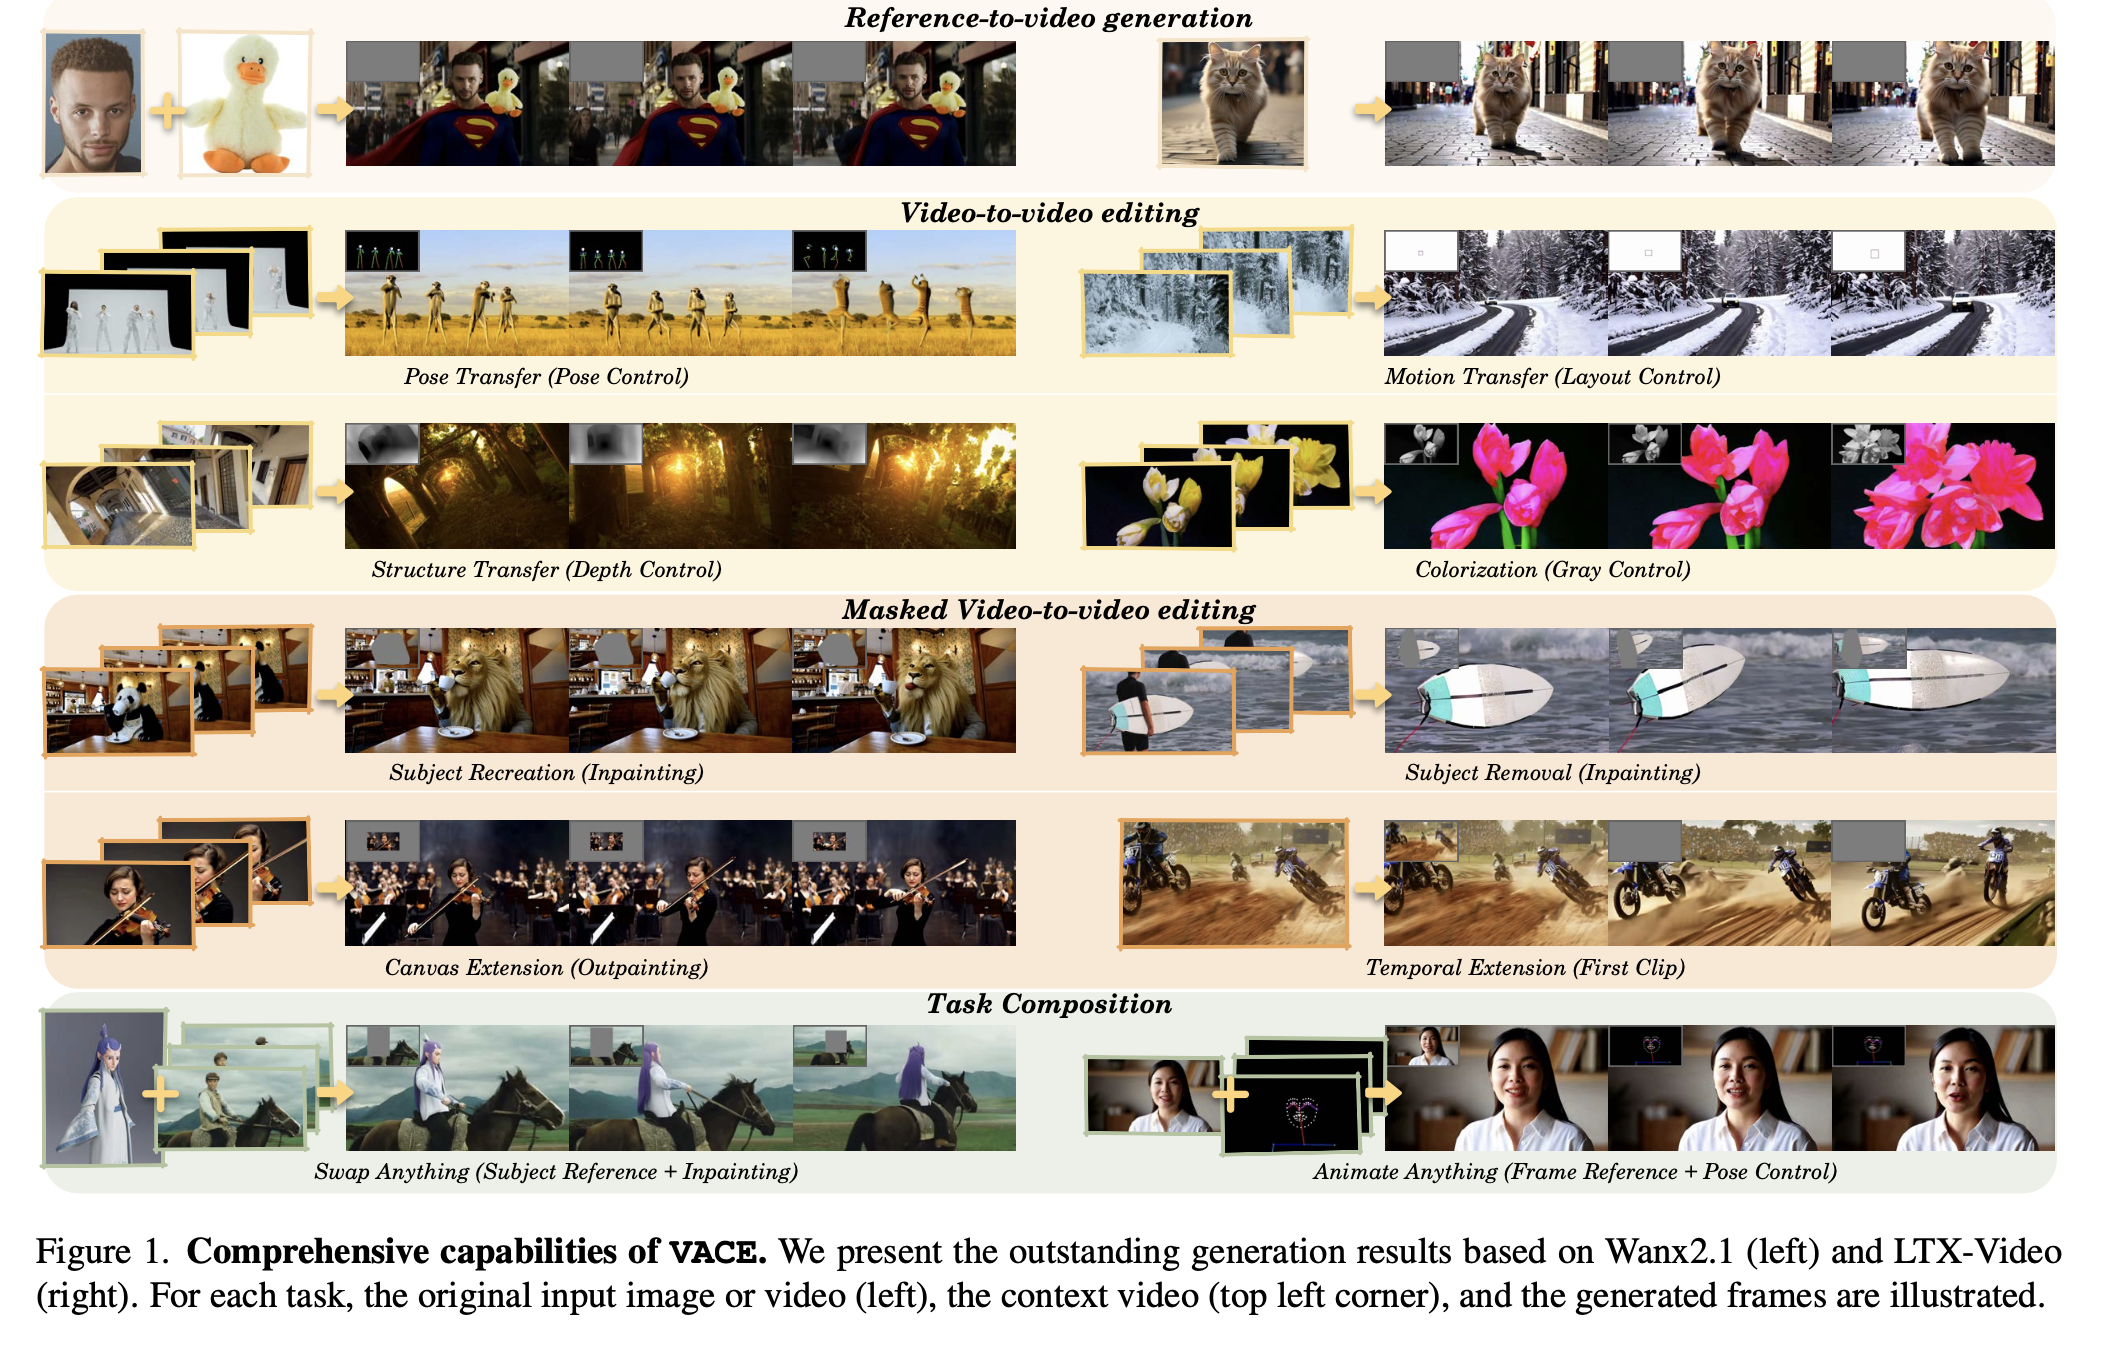
In open-source video generation, one model still stands above the rest as the Swiss-Army knife for high-quality video editing: WAN 2.1 VACE. From their research paper, the Alibaba team defines VACE as "Video tasks within an All-in-one framework for Creation and Editing".
While a lot of models go straight from text to a video, or from an image to video, VACE has been trained to understand many different video editing tasks.
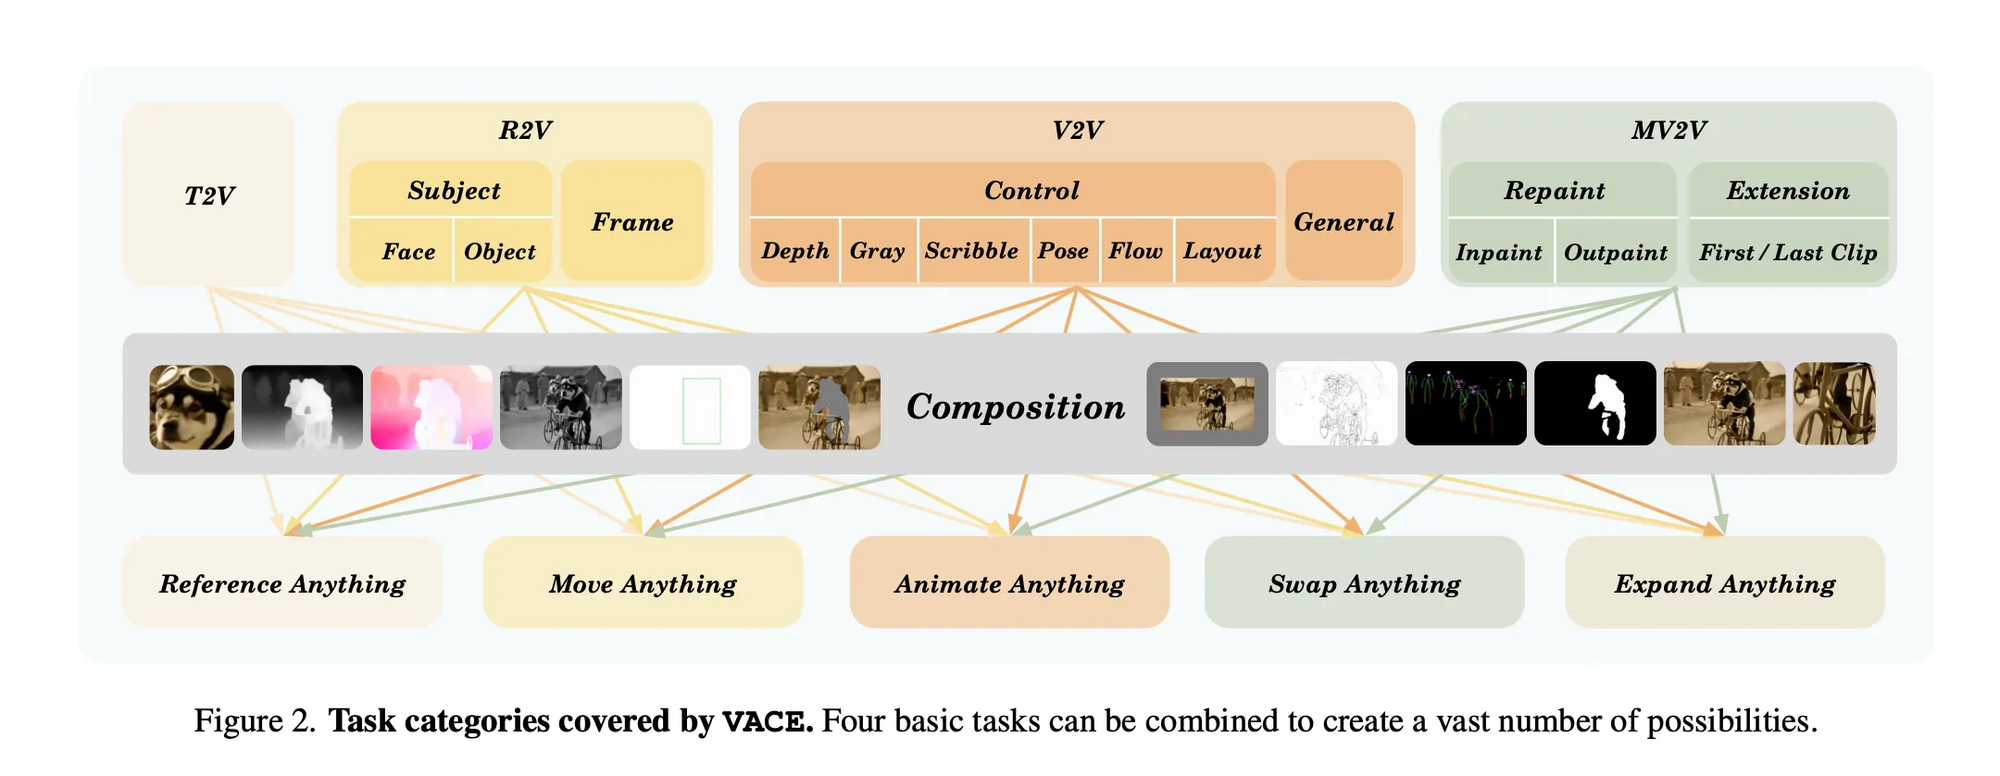
VACE has the following building blocks:
- T2V - Text to Video
- R2V - Reference Image to Video
- V2V - Video to Video
- MV2V - Masked Video to Video
This allows you do to precise edits to a video, giving artists more control over the end output. For example you can replace actors, move items, animate characters, expand frames, or repaint masked regions. WAN has been a real champion of Open Source in 2025, releasing a suite of models.
To put the timeline in context what WAN has been cooking so far this year:
- Feb 25th, 2025 - WAN 2.1
- 👉 March 14th, 2025 - WAN 2.1 VACE
- July 28th, 2025 - WAN 2.2
- August 26th, 2025 - Wan2.2-S2V-14B (audio to video)
- September 19th, 2025 - Wan2.2-Animate-14B
They also have a WAN 2.5 behind closed API as of writing, it is yet to be seen if they will release this model in open source. Although WAN 2.1 was released in March, it remains one of the better tools in the hands of talented artists like we will see in this example today.
Model Architecture
If you follow along with Fine-Tuning Friday's you know we like to take a peek under the covers of these models to understand the internals.
The architecture is based on WAN 2.1, but extended through what they call Concept Adapter Tuning, or more fine-tuning on the base model.
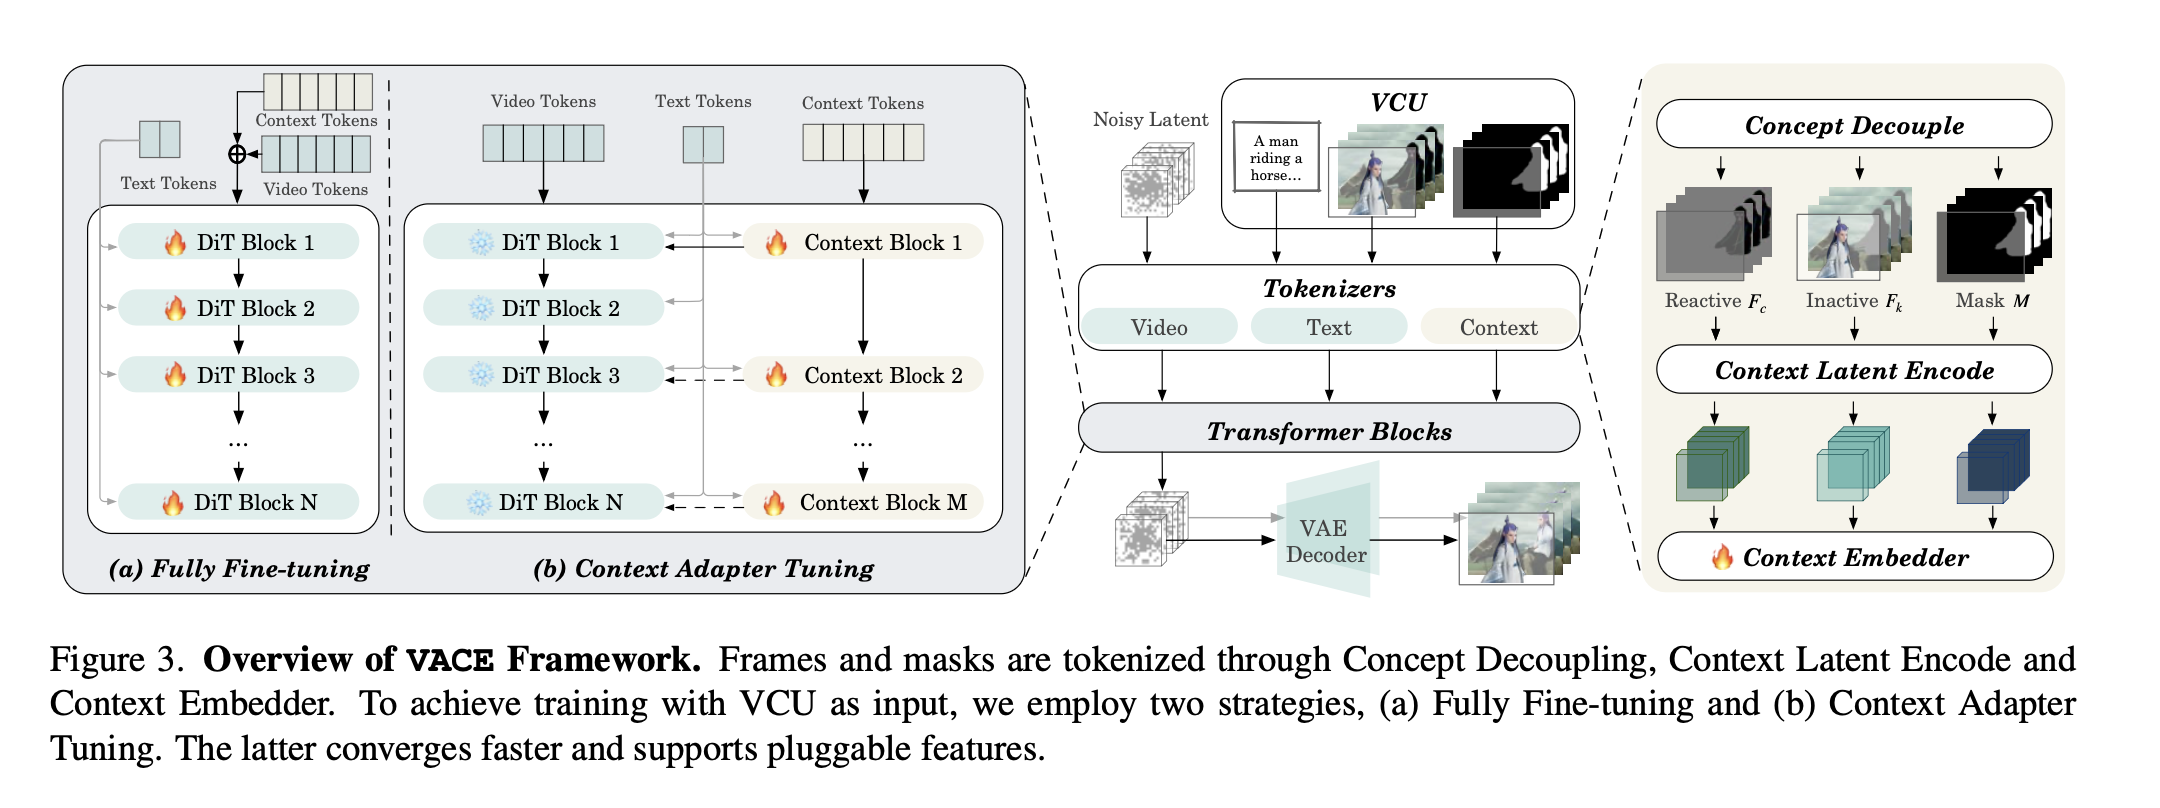
The concept adapter fine-tuning allowed them to train and compose different capabilities into the model. Each task is fed through the model through "context tokens" and context blocks that are separate from the model DiT Blocks. Interestingly enough, training the concept adapters trains faster and gave them better performance than combining the video and context tokens and performing a full fine-tuning. The nice thing about this approach is it allows you to quickly add new capabilities through the context block weights themselves.
It has yet to be seen if Alibaba will train a WAN 2.2 VACE model, so for now fine-tuning WAN 2.1 and applying your LoRA with the VACE adapters is a good strategy.
The Workflow
Now that we understand the capabilities of the model, we can talk about how we can chain inputs into a ComfyUI workflow and perform our end to end jacket swap.
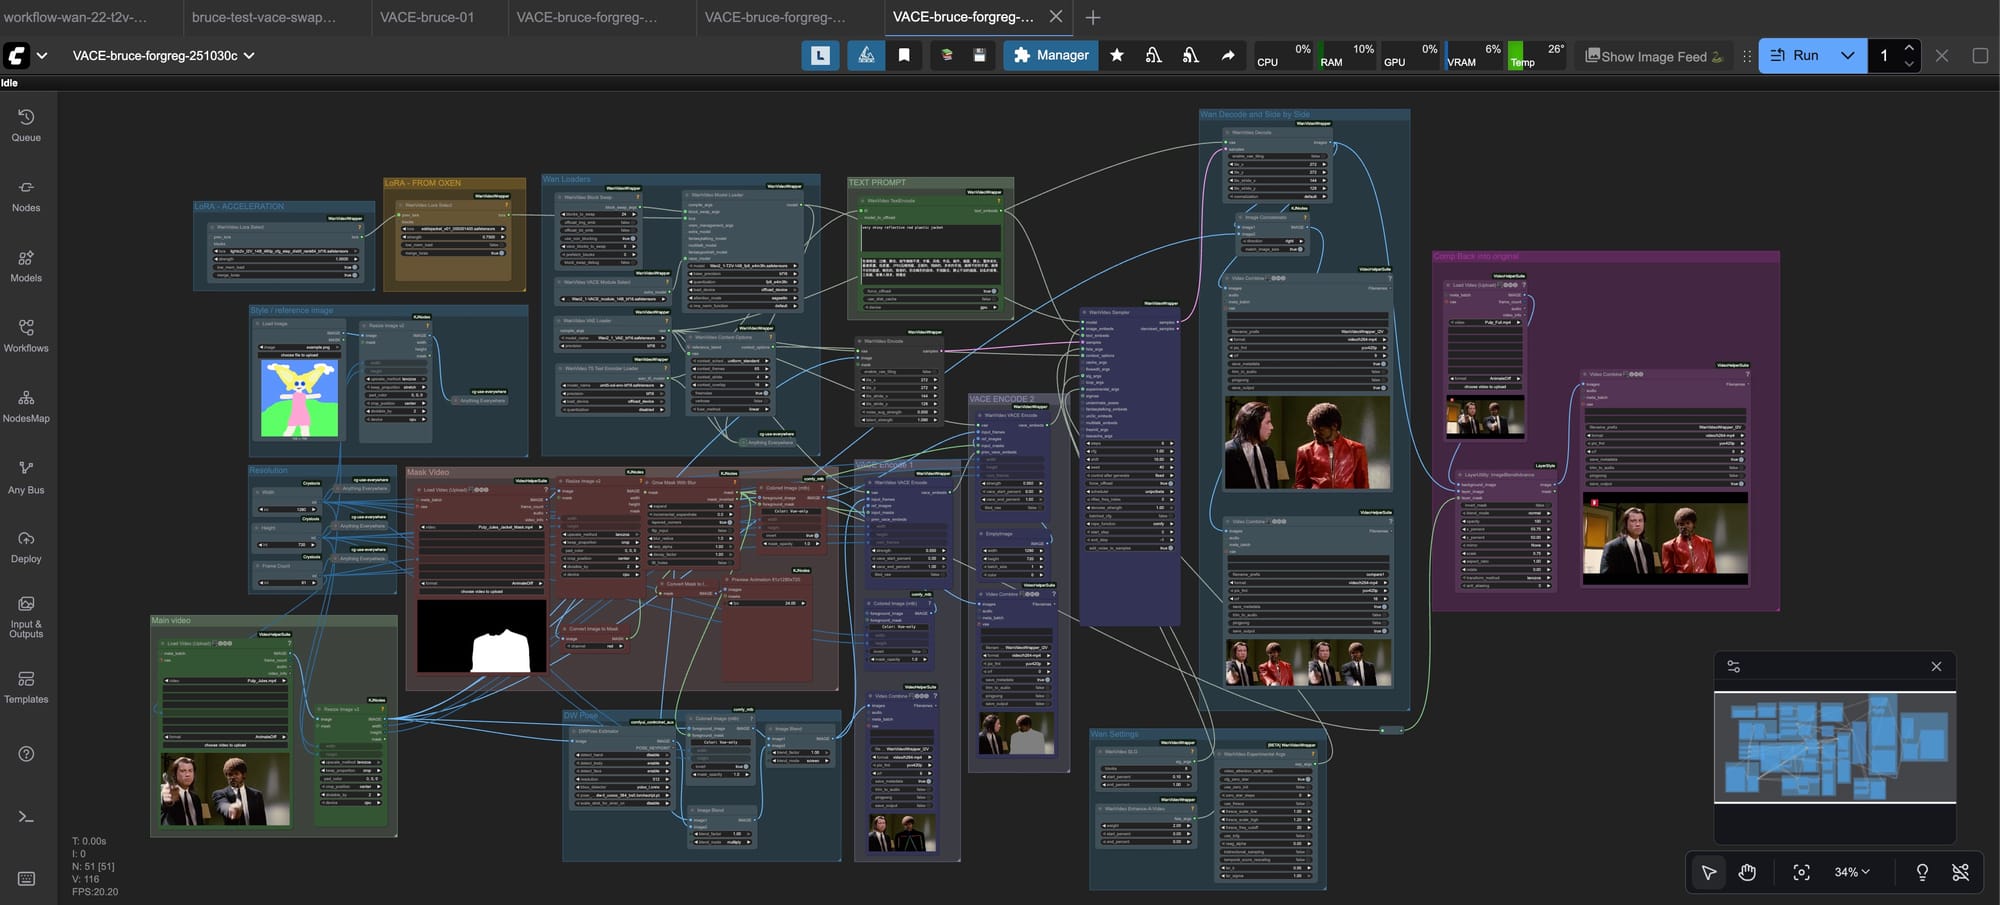
The above may look a bit intimidating at first, but let's break it down step by step. If you just want to download the workflow with the files, feel free to grab them from Oxen.ai.
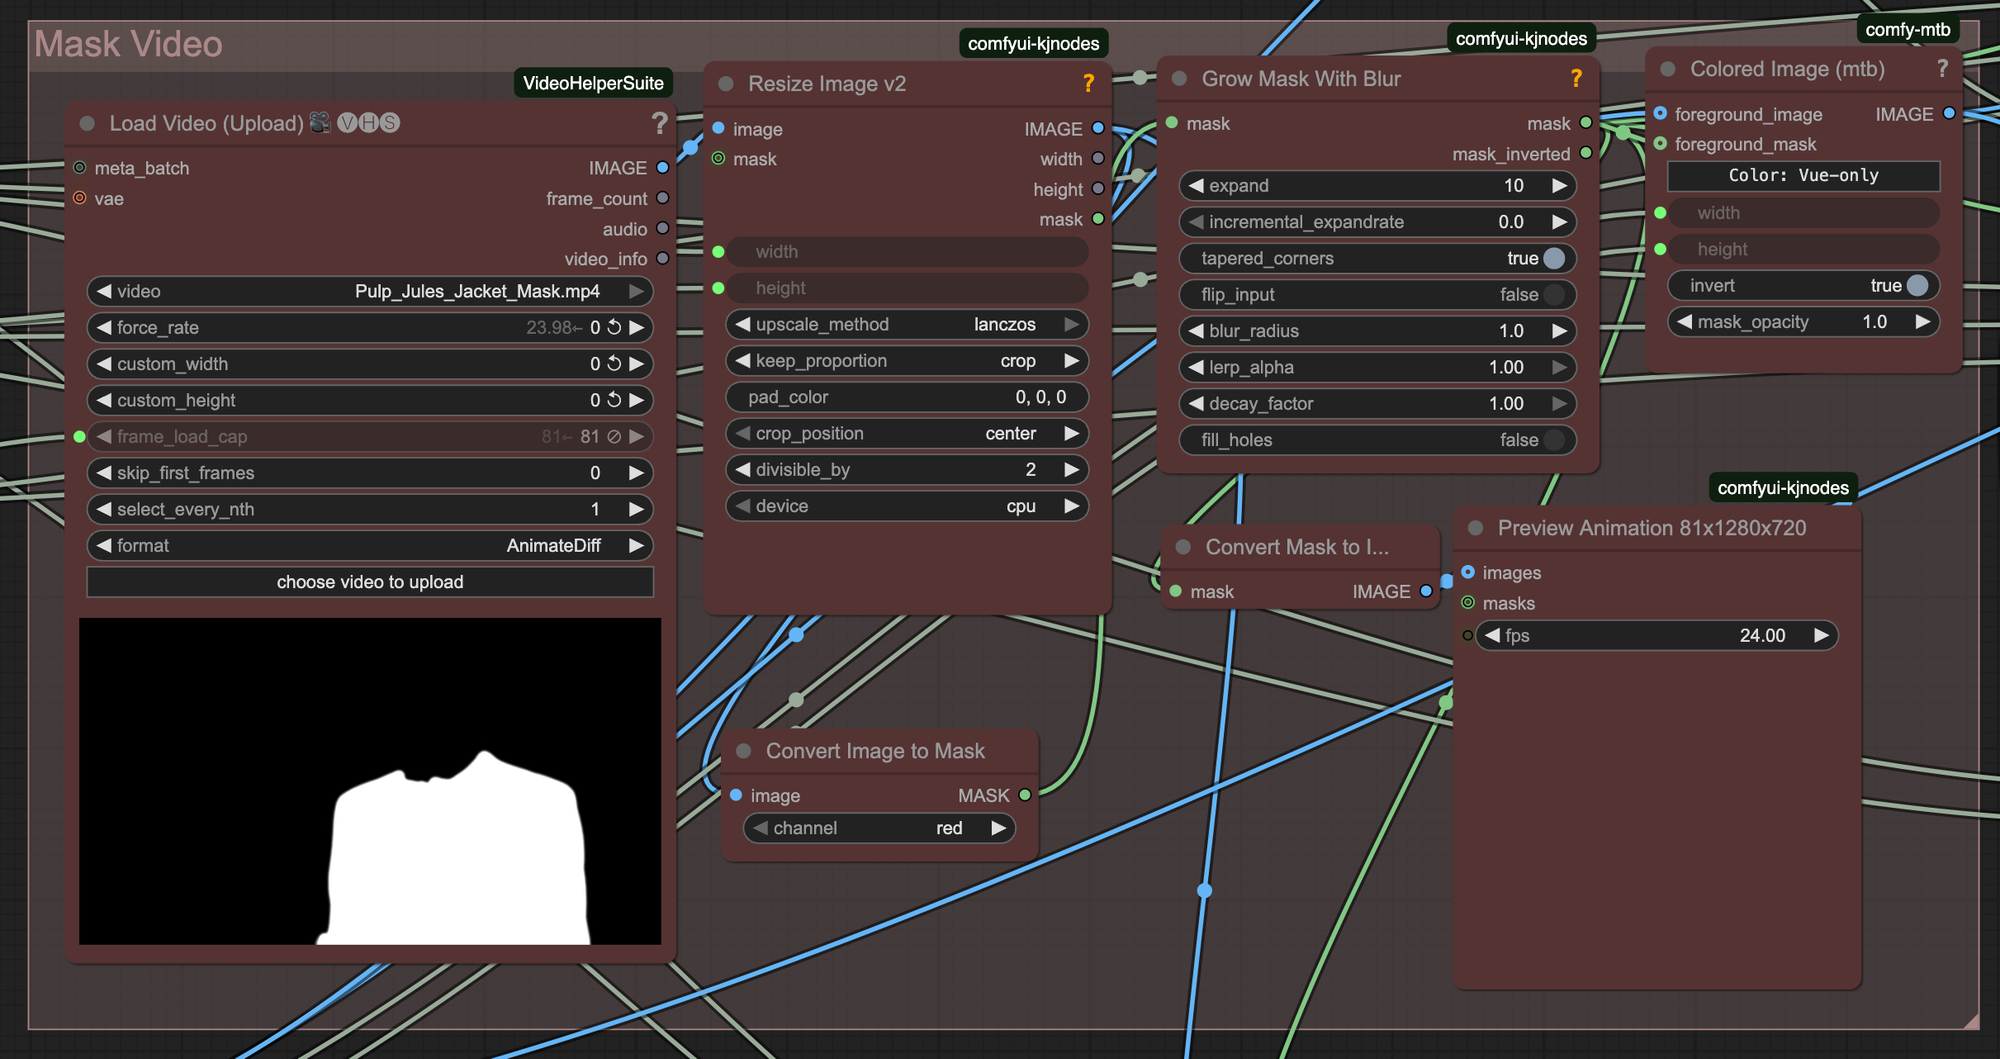
Step 1: Masking
The first step in this workflow is going to be passing in a masked video of the region that you want to edit. In this case the mask was generated in After Effects, but there are other more automated AI tools like Segment Anything 2 that can also segment the video frames. The mask is binary with 1s (white) symbolizing where to edit and 0s (black) representing where not to edit.

Another important tip when using WAN 2.1 VACE is to try to stick to 1280x720 and 81 frames at 16 fps (5 seconds+1 frame). This is the dimensions and duration that VACE was trained at, if you go outside this range you may get significantly worse results. At the end we will show you how to composite it back into the original scene if 1280x720 is too small.
The mask is then passed into a "Grow Mask With Blur" node from the comfyui-kjnodes pack. This helps the mask be a softer transition to the actual pixels in the original video.
Step 2: Pose Estimation
The next piece of input that was helpful for this particular workflow, and any replacement involving humans, is adding in pose estimation. In this case we will use the DW Pose estimator and combine and combine that with the masked region to guide the generation.
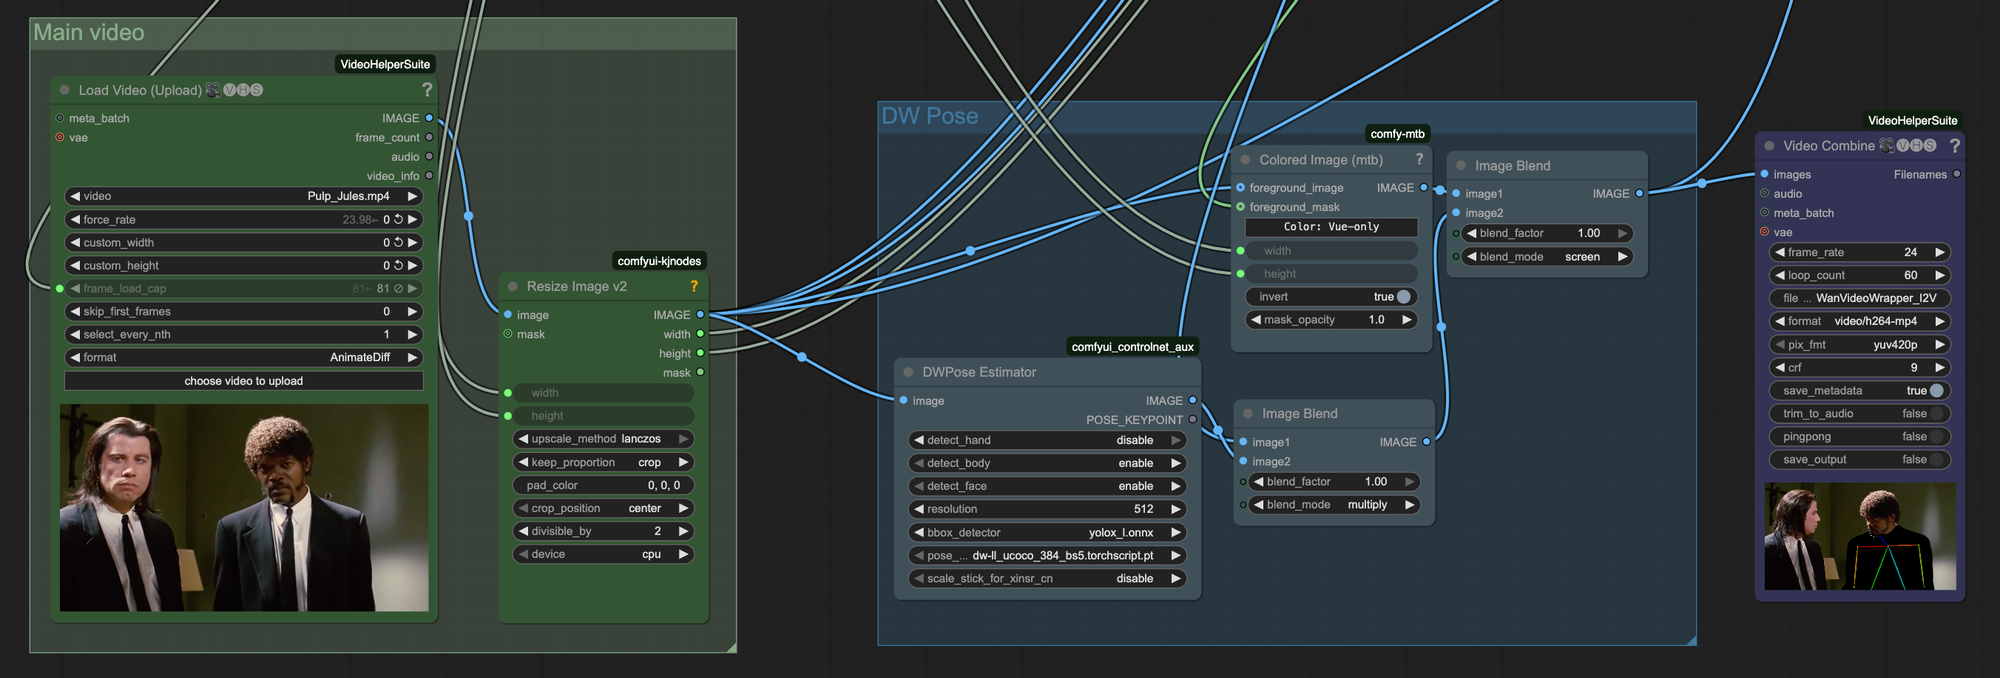
Both the masked frames and the pose estimation frames will be encoded into the WAN 2.1 VACE context to give the model guidance on what pixels of the video to focus on replacing.
Step 3: Jacket Specific LoRA
When generating a specific character, piece of clothing, hair style, or expression, sometimes prompting alone will not give you the results you want. To give a sense of this we did do a few prompting experiments before going the fine-tuning route.
For example, this is what it looks like if you use Qwen-Image-Edit to "Place the red jacket on the man on the right" with Eddie Murphy as a reference image.

Honestly, pretty impressive for zero-shot, but if you look closely, the lighting and the texture of the jacket, let alone his chest, are not quite right. They look plastic-y, kind of like a video game character, and definitely would not pass in a Hollywood grade film.
Let's see how WAN 2.1 VACE does out of the gate with a prompt of "very shiny reflective red plastic jacket".
While it does accurately follow the mask and pose guidance, this is definitely not the red jacket that we are going for. This is where fine-tuning can be a very powerful tool in the tool belt.
In order to collect a dataset for fine-tuning, we downloaded the full set from YouTube, chopped up the frames, and captioned them with an LLM to describe what Eddie Murphy was doing in the scene in one sentence or less.
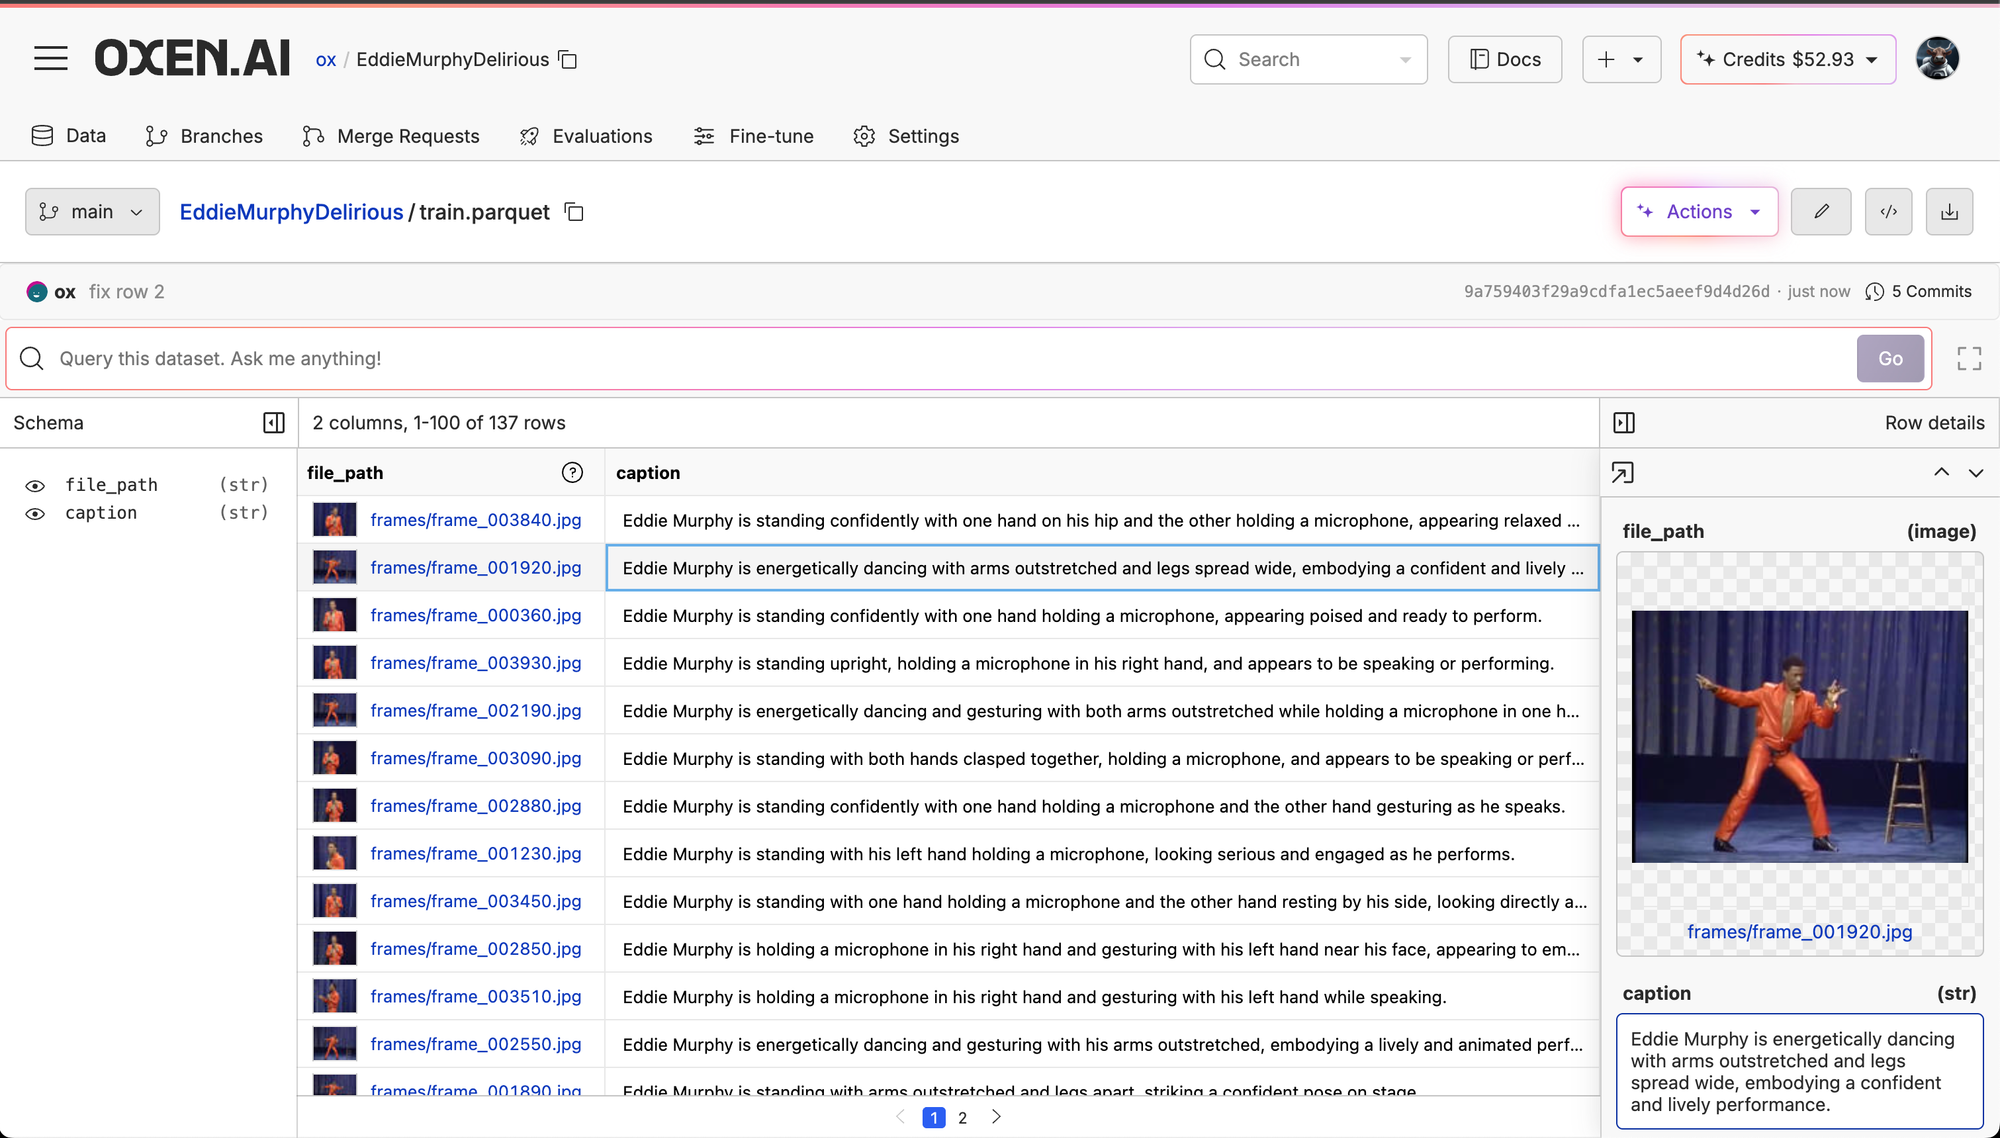
If you are not familiar with Oxen.ai, it allows you to run LLMs on images in order to generate captions. If you want to learn more, there are some good tutorials in the developer docs.
Once the images are captioned, you can train a LoRA directly from the dataset in Oxen.ai. Simply click "Actions" -> "Fine-Tune" and you can configure and run your fine-tune. In the background Oxen.ai spins up powerful GPU infrastructure to train your model, and will spin them down once the run has completed. The LoRA weights get saved back to your repository for download.
Back to our ComfyUI workflow, we then load two LoRAs:
1) Our custom LoRA from Oxen.ai
2) The lightx2v_I2V_14B_480p_cfg_step_distill_rank64_bf16.safetensors acceleration LORA
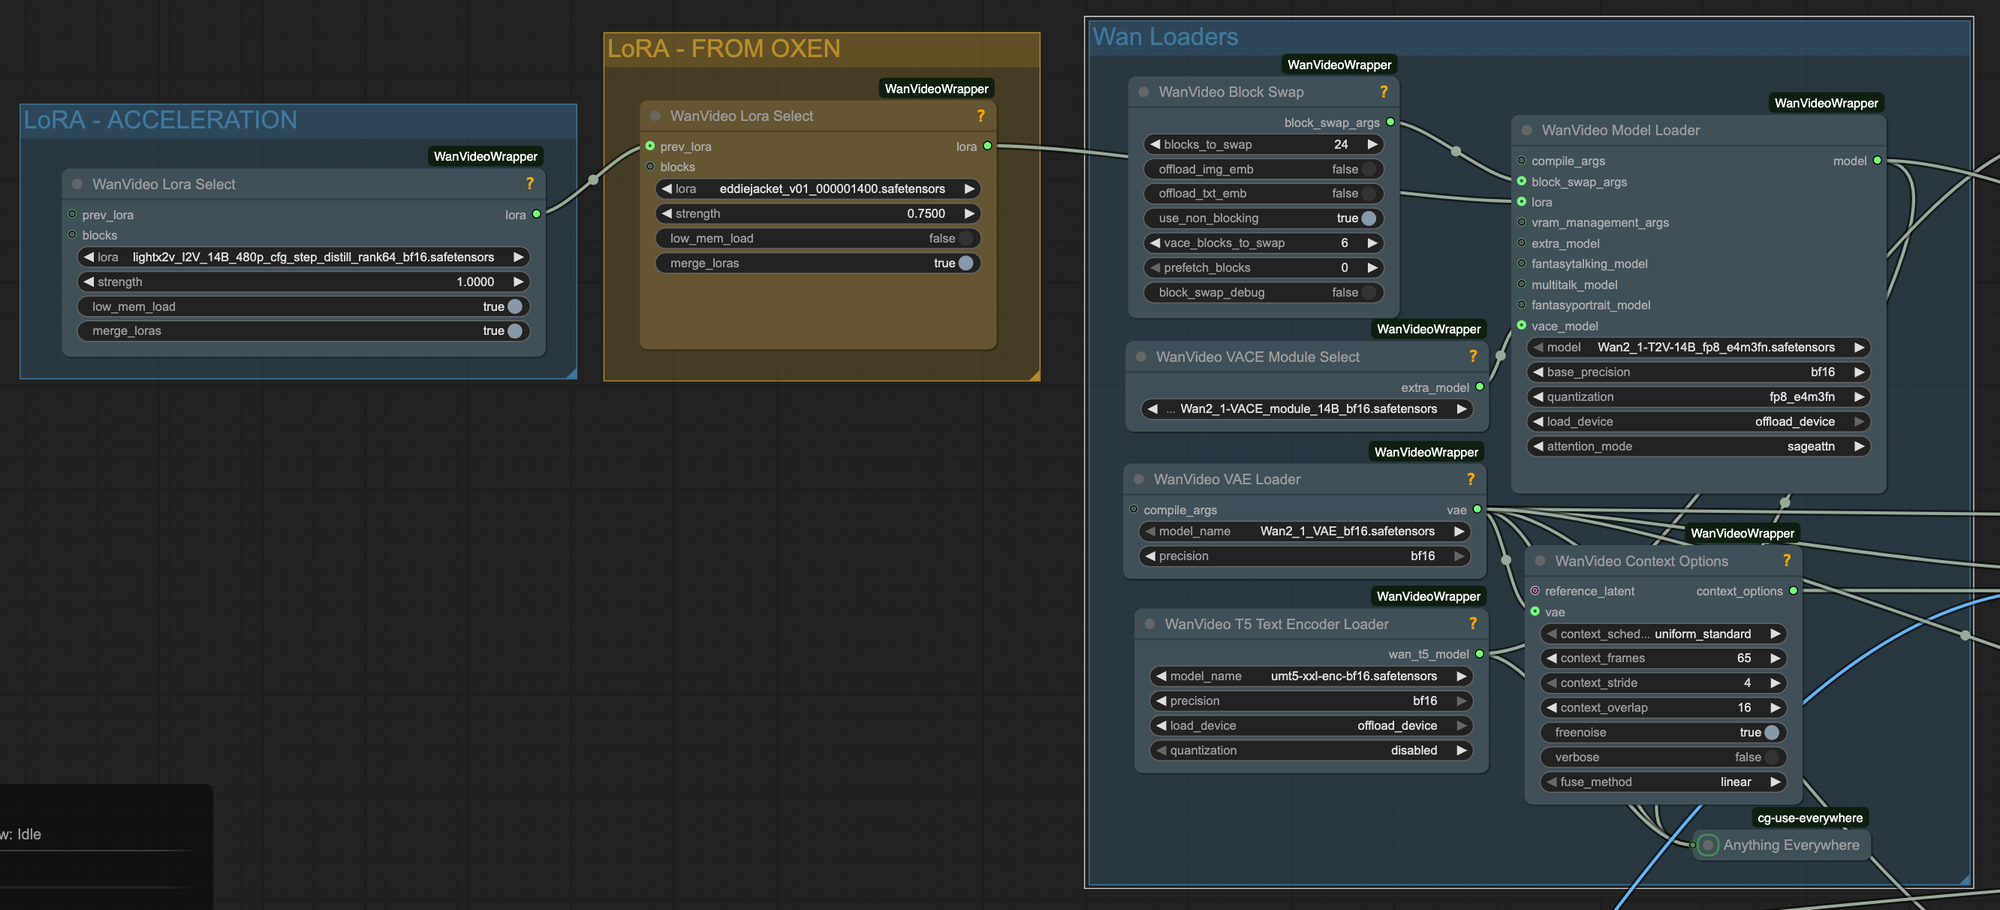
The acceleration LoRA makes it so it takes less steps to generate the final video. While it can affect the quality slightly, it is usually worth it for speed of iteration.
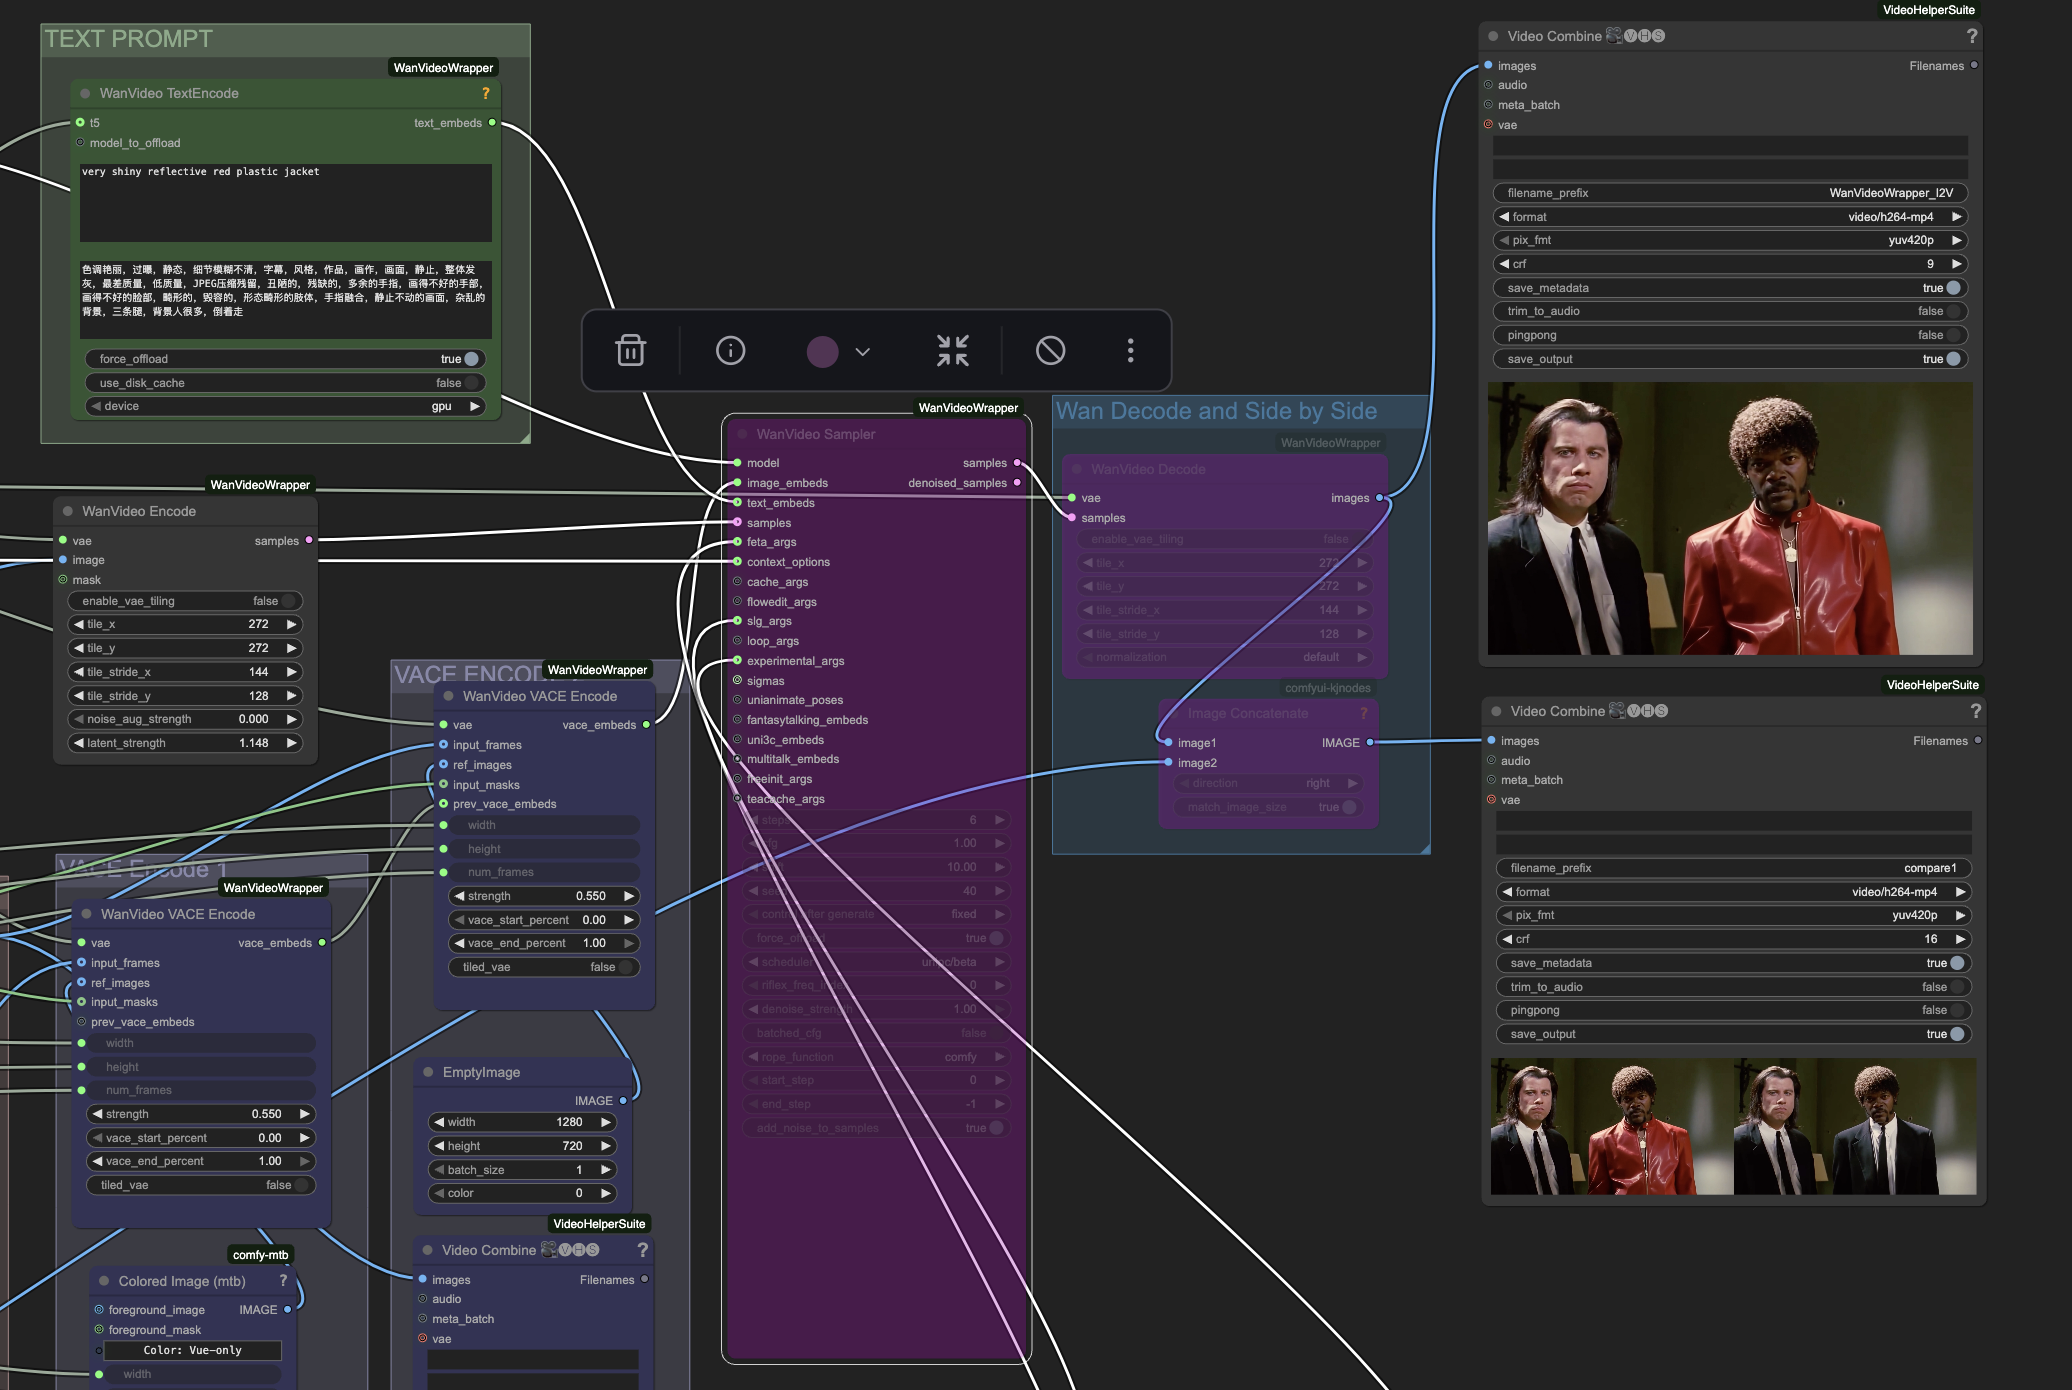
Step 4: Encoding and Sampling
Now that we have all the inputs prepped of the mask, the pose, and our custom trained LoRA, it's time to put it all together with a prompt. In ComfyUI you'll need to run each one of the inputs through a WanVideo VACE Encode node to encode the data and feed it into the sampler.
We are using the same prompt as before of "very shiny reflective red plastic jacket" combined with the LoRA to get this final generation.
Step 5: Stumbling through Experimentation
If you work with AI, you will know it can be a bit random and inconsistent with results. It took a few tinkering of random seeds and hyper parameters, as well as re-training of the LoRA to get everything right. Let's walk through some (pretty hilarious) failure cases and talk about what we did to fix them.
The first failure case was the LoRA overfitting to the microphone in the training data. If you look at the first iteration of our training data, we don't mention anything about a microphone, so the model assumes we always want this in the shot.
Switching the random seed did sometimes fix this, but still would leave a chord on the gun.
A tip for how to think about prompting in your training data is "prompt what you want to direct". So if you want to control whether there is a microphone or not, mention that in the training data examples.
We ended up re-captioning the images, this time with more specific prompts that look like this.
Eddie Murphy, holding a microphone with a chord, very shiny reflective red plastic jacket, standing with legs apart and arms extended, pointing to the side.Here's the final dataset for reference. We also upres'd all the images using Topaz to get a bit higher quality jacket this round than the 480p YouTube video.
This new LoRA ended up doing much better, and left us with this final generation:
Pretty good for a days work! All in all, starting from the ComfyUI Workflow, you can get pretty good results with Fine-Tuning in less than a day. There is always more experimentation and refinement you can do with random seeds and sampler settings, but overall we were happy with the results.
Conclusion
Some people pitch AI as a “one-click solution” for everything, but when you look at true Hollywood-level results, that’s not reality yet. Achieving cinematic-quality video still requires careful artistic judgment and multi-step workflows. At Oxen.ai, we believe in empowering creators by letting them train and fine-tune open-source models themselves, giving them full control over the entire process. If that aligns with your view of the world, feel free to join our discord, we would love to chat more!
If you want to get started with fine-tuning in Oxen.ai, you can create an account for free and start training LoRAs today. Follow along with our documentation for how to get started:
Happy Fine-Tuning!
~ Oxen.ai Herd
Member discussion